Who, in a thousand years, ever thought that the ridesharing idea would be so popular? The idea of paying total strangers to drive you and your kids around sounds dangerous, but with Lyft and Uber family options it couldn’t be safer.
These services have allowed thousands of people to work on their own schedules, open up parking spaces, and importantly keep a lot of drunken drivers from taking the wheel.
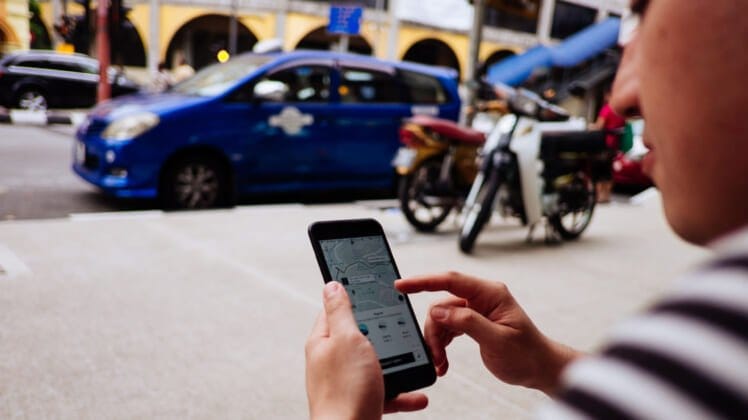
Best of all, Uber and Lyft ridesharing services offer a convenient and affordable transportation option for families, especially when travelling in a big city.

Is it Safe to Use Uber Or Lyft with Kids?
Yes, it’s safe. Just follow car seat and booster seat requirements. If you’re comfortable riding in a taxi with your kids, you will surely feel safe while using Uber or Lyft with your kids.
However, there are some safety and common sense things to consider, yet ridesharing is generally considered a safe, secure and smart way to travel.
Uber and Lyft Safety Tips
1. Wait for your Ride in a Safe Place
The Uber or Lyft app will tell you exactly where your driver is, so you only need to go out and meet the driver at the last possible minute, so request your ride while you’re still inside and remain in an area that is well lit, comfortable, & in the presence of other people for as long as possible.
2. Always Ask, “What’s my Name?”
Don’t walk right up to every car that pulls up. From the sidewalk, ask the driver, “What’s my name?” or “What name do you have?”.
3. Check the Driver
Make sure that you and your kids know to check that the car and driver match the app’s description before they get in the car.
4. Be Aware
Once in a car, you should use the app or pay attention to the driver’s route to ensure that they aren’t heading to a different location. If the driver changes the way, then you should ask the driver to stop the car immediately.
5. Track the Route
Parents should use the technology to track their kids’ routes to make sure that the ride goes as planned. After the trip, it’s a good idea that kids should text or call their parents.
6. Verify the License Plate
When your Lyft/Uber driver is on the way, the app will send you the driver’s first name, picture, the model of their car, and the license plate number. Ensure that the license plate matches and check the car model itself.
7. Verify the Photo
Match the photo sent to you by the app to see if it look likes the driver. If you’re a bit unsure, ask the driver their name and triple check the license plate number and car model.
8. Look for the Color Coded Circle on the Car
Not all rideshare app cars have an identifying sticker on their vehicle but still check for one. Usually, the Uber/Lyft car will have a label in the window identifying it as a taxi, etc. If there’s no sticker on the vehicle, then check the photo and license plate number again.
9. Don’t Ride Alone
If you can share a ride with a friend, do it. There is strength in numbers and you can split the cost to boot.
10. Use Trip-Sharing Features
Both Uber and Lyft have got in-app trip sharing features that allow you to share live updates on your trip with trusted friends. Click “Share Trip Status” in Uber or click “Share Route” in Lyft.
11. Consider more Personal Safety Technology.
Using other devices and apps can add more layers of protection; some apps like iWitness turn your phone into a mini security system, with an alarm, a security camera & emergency 911 calling just a tap away.
12. Let the Uber/Lyft Driver Know that the Trip is being Tracked
People are more likely to commit more crimes when they think that they are not going to get caught, so it’s better to indicate that people are looking out for you. You can make a phone call and can tell someone that you are on an Uber. If they don’t answer, leave them a voice note.
13. Choose where to Sit Wisely
Uber and Lyft advise its users that it’s safer to sit in the back of the car because it creates two possible exits & increases space between the driver & the passenger. Also, sitting on the passenger side (instead of behind the driver) helps you keep an eye on both the driver and the road.
However, all vehicles & the situations are not the same, so it’s better to choose a seat with easy access to the door.
CHECK OUT: Stepping out, how to prepare for business travel and work relocation.
How To Use Uber Family Profiles:
What It Is And How To Set It Up?
The Uber Family Profiles feature is an option that enables Uber users to pay for the rides made by others. By using this feature, you can not only add your family members, but you can add anyone, such as co-workers or your friends.
This feature is very useful and quite handy if you’re a parent and want to book a ride for your college-going child. If you’re wondering about how this Family Profile feature works and how to set it up? Here’s a step-by-step guide:
If you’re the organizer of the Uber Family Profile, the you need to do the following steps:
Step 1: First of all, update your Uber app to the latest version.
Step 2: Navigate to Menu and Select Settings.
Step 3: Then, scroll down and look for the “Add Family Profile” option. Once located, select “Create Family Profile” and then add the contact (your kids or friends) you wish to add to the list. An invitation will be sent to the individual you’ve just added.
Step 4: Once the Uber Family Profile rider accepts the invite, then they will have the option of requesting a ride from their handset. They can easily use the family profile as the mode of payment.
The ride’s cost is automatically calculated and billed to the Family Profile, and the organizer of the profile will get the receipt for each trip.
And if you’re a Family Profile rider, here’s what you need to do:
Step 1: Firstly, open the Uber Family Profiles email invite sent by the organizer & accept it.
Step 2: Make sure that you have the latest version of the app installed. When you’re riding for the first time, make the Uber Family Profile the default method of payment.
Step 3: Request for a ride as usual and you’re good to go! The organizer is directly billed, so you don’t have to look for a bill at the end of your ride.

A Guide to Traveling With Your Dog