
Ever wondered how to use Gua Sha, or if it’s even worth it? You’re definitely not alone. With the plethora of skincare tools and accessories on the market, it can be difficult to determine which, if any, are actually effective and not just a gimmick.
As Gua Sha, in particular, has grown in popularity, you’ve likely seen influencers or celebrities sliding a curved tool over their skin, stating the important role it plays in their skincare routine. While it can certainly create a luxurious experience, Gua Sha has been around for centuries and is a trusted practice for boosting skin’s radiance.
What is Gua Sha?
“Gua Sha is a traditional Chinese healing method in which a trained professional uses a smooth-edged tool to stroke your skin while they apply light pressure to the tool,” said Jessica Houston, Lead Esthetician & VP of Operations at BEAUTYBEEZ.
Gua Sha benefits
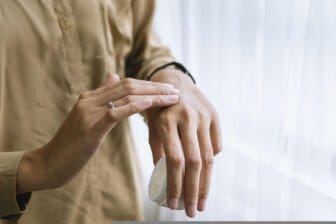
Not only can Gua Sha result in glowing skin, Houston says, but it also helps to increase circulation, improve lymphatic function, decongest the skin and reduce inflammation. If you’ve ever wondered how to use Gua Sha, Houston is here to share her best tips and tricks. Before attempting the technique, it’s important to cleanse the skin and apply an oil or cream that will help the tool slide over the skin. “Some common mistakes that people make when using the Gua Sha are not cleansing the skin prior to using the tool or forgetting to apply a light oil or cream to help the Gua Sha tool glide more easily.
How to use Gua Sha, according to an esthetician
When it comes to how to use Gua Sha, it can be Houston suggests starting on your forehead, applying gentle but firm pressure with the ridge side of the Gua Sha down. Move the tool in small circles from the middle of your forehead out towards your temples, all the way to the hairline.
Next, move to the eye area, applying a bit of eye cream first to minimize pulling. Position the top corner of the Gua Sha tool’s groove near the corner of your eye and slowly massage it under the eye out towards your ear, all the way to the hairline. “Repeat with the bottom corner of the groove at the top of the eye, and work the tool over the eye, following the line of the eyebrow out to the hairline,” Houston says.
Then, hold the tool (still ridge side down) at the edge of the bridge of your nose, pulling gently across your cheek to your hairline. “Work your way down the side of your face, beginning at the center and moving out towards the ears,” Houston says. “End by working the Gua Sha from the middle of your chin along the jawline until you touch the bottom of your ear.”
Using slightly firmer pressure, massage the Gua Sha from the center of the chin along the jaw, following the bone. When you reach your ear, pivot the tool so the ridges lay flush with your neck, bringing it down to your collarbone. “This will help drain the toxins from the lymph nodes on either side of your neck,” Houston says.
You can also use the Gua Sha tool on your neck and shoulders — just make sure to apply plenty of oil so you don’t cause any irritation. Starting near your collarbone, glide the Gua Sha tool up your neck towards the jaw. Move up from the center, then work your way around the side of the neck until you reach your shoulder, always working the tool upwards.
According to the esthetician, you can follow this Gua Sha routine two to three times a week — it’s sure to make for a soothing end to your nighttime routine.